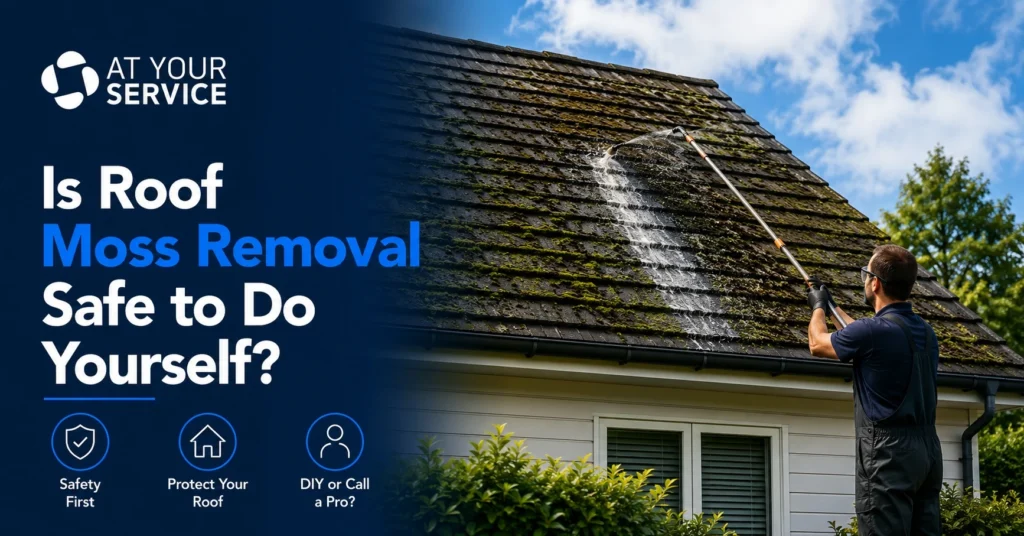
Whether roof moss removal is safe to do yourself depends on two things: the method you use and the pitch of your roof. Low-pressure chemical treatment applied from a stable ladder on a low-pitch roof is manageable for most competent homeowners. Physically climbing and scrubbing a steep roof without fall protection equipment is genuinely dangerous, regardless of what you’re removing. The distinction matters because the most common DIY mistakes, pressure washing, aggressive scrubbing, and climbing without safety gear, all cause either roof damage or personal injury.
In this guide, you’ll learn what moss and lichen actually do to NZ roofs, the real safety risks of working at height, which methods are safe and which are not, a step-by-step DIY process for those who can do it safely, what prevents regrowth, and when hiring a professional is the right call.
Quick Answer: For low-pitch roofs, the safest DIY approach is applying a diluted sodium hypochlorite or moss killer solution at low pressure and allowing it to work over several weeks. Do not pressure wash, do not aggressively scrub, and do not walk on a moss-covered roof without fall protection. For steep roofs or significant lichen growth, professional treatment is safer and more effective.
Roof Moss Removal Method Guide
| Method | Safe for DIY? | Effective? | Risk to Roof | Results Duration |
| Low-pressure chemical spray (biocide) | Yes, from ladder on low-pitch | Yes, kills at root | Very low | 2 to 3 years |
| Store-bought moss killer spray | Yes, with care | Moderate | Low | 6 to 12 months |
| Soft brush scrubbing (dry moss, low-pitch) | Cautiously, with safety gear | Moderate | Low if gentle | Temporary without treatment |
| High-pressure water blasting | No | No, does not kill roots | High, cracks tiles, voids warranties | 3 to 6 months only |
| Aggressive scrubbing or wire brush | No | Removes visible growth only | High, damages coatings | Temporary |
| Zinc or copper strip installation | Yes, preventative | Yes, long term prevention | None | Several years |
| Professional soft wash treatment | Professional only | Highest | None | 2 to 3 years |
What Moss, Lichen, and Algae Do to NZ Roofs
Before deciding whether to DIY or hire someone, understanding what moss actually does to a roof explains why the choice of method matters so much.
Moss traps moisture against roofing surfaces, accelerating wear, lifting tiles, and increasing the risk of leaks. New Zealand’s humid conditions, frequent rainfall, and shaded properties create the perfect environment for moss spores to settle and grow. Roof areas that receive minimal sunlight, such as south-facing slopes or sections shaded by trees, are especially vulnerable.
Moss retains moisture, which can seep into tiles and underlayment. As moss spreads, it can lift tiles or shingles, leaving gaps for leaks. Over time, moisture build-up can cause timber to rot, leading to costly structural damage.
There is a distinction worth understanding between moss and lichen. Moss looks soft, green, and fluffy and can grow in thick mats, especially in shaded areas that stay damp. Lichen appears flatter and is more tightly bonded to the surface. Lichen is significantly harder to remove than moss because it physically bonds to the tile surface. A moss problem caught early is far more manageable than lichen that has had years to establish.
Moss affects different roofing materials in different ways. On concrete and terracotta tiles, it causes lifting and cracking. On metal roofing including Colorsteel and Zincalume, moss traps moisture that leads to corrosion at the coating level. On older cement-fibre tiles, moss penetration accelerates surface erosion.
In places where tiles or shingles haven’t lifted but moss has grown underneath them, tiles may have come to rely on the moss for support, and removing it later on can cause even more damage. This is why early treatment, before growth becomes severe, produces both safer and more effective results.
In our experience treating roofs across New Zealand, the properties with the worst moss damage are almost always those where the problem was noticed early and ignored, often because the roof looked clean from the street when in fact significant growth was occurring on the south-facing slope out of view. Annual inspections from the ground, using binoculars if necessary, are enough to catch growth before it becomes structural.
The Real Safety Risk: What WorkSafe NZ Says
This is the most important section in this article for anyone considering DIY roof moss removal.
More than half the falls reported to WorkSafe from the construction sector occur from less than three metres, and most of these falls are from ladders and roofs. The cost is estimated at $24 million each year.
According to WorkSafe New Zealand, falls from height cost the country $24 million annually, and the toll on the livelihoods of workers and their families is far greater. In the construction sector, residential building sites are the biggest offenders, with more injuries happening there than in any other construction workplace.
The reason this matters for roof moss removal specifically is the compounding risk factor: moss makes roofs slippery, and falls are a serious safety hazard when attempting DIY roof treatment without the right safety gear. A roof that is already slippery from rain becomes significantly more dangerous when wet from a moss-softening treatment. Adding a person on that surface without fall protection equipment creates an unacceptable risk.
WorkSafe NZ consistently places falls at the top of workplace fatality statistics, and residential roofing sits squarely in that risk category from the moment anyone steps above eave level.
The honest assessment of when DIY roof moss removal is and isn’t appropriate:
It is manageable when: The roof pitch is low and walkable. You have appropriate non-slip footwear and ideally a safety harness. You are applying treatment from a stable ladder position rather than walking on the roof surface. The weather is dry and settled. You are treating a single-storey property.
It is not appropriate when: The roof pitch is steep. The roof surface is wet or already moss-softened. You do not have appropriate height safety equipment. The property is two-storey or higher. The growth is severe and requires significant physical effort to address.
Methods That Damage Your Roof
These are consistently flagged by NZ roofing professionals as the most common DIY mistakes, and all three cause more damage than the moss itself.
Do Not Use a Pressure Washer
High pressure can strip protective coatings, crack tiles, and even void roofing warranties. Water blasting also doesn’t kill moss and lichen at the roots, meaning regrowth can happen quickly. Many experts recommend avoiding water blasting as a primary treatment method, especially on older or more delicate roofs.
Avoid high-pressure washing on roofs. The pressure can crack tiles, dislodge pointing, and drive water under the roof. On long-run iron and metal tile roofs, high-pressure washing can also strip protective coatings and cause premature rust.
Pressure washing produces results that look impressive immediately but often cause damage that only becomes obvious weeks later, when voided coatings start to show wear or cracked grout lines allow water ingress. It is the single most common cause of preventable roof damage we see following a DIY clean.
Do Not Aggressively Scrub
Harsh scrubbing, wire brushes, or pressure washing can crack tiles and void warranties. On concrete tiles, aggressive scrubbing removes the colour-sealing layer. On metal roofing, wire brushes penetrate protective coatings. On older cement-fibre tiles, scrubbing can physically break down the surface.
If physical removal is necessary for large, dry, loosely attached moss clumps, on concrete or clay tile roofs you can carefully brush off dry moss with a stiff brush. Always work downward, never side to side, as sideways motion can displace tiles.
Do Not Use Bleach at Full Concentration
Diluted bleach is part of many professional soft wash solutions and is effective when correctly mixed. Undiluted bleach applied directly to roof tiles damages cement-based coatings, can run off and harm garden beds, and can discolour some tile finishes. If using bleach, dilute it to approximately 1% bleach in water as a starting point.
How to Remove Moss from Your Roof Safely?
This method applies to homeowners with appropriate roof access, a low-pitch roof, and the right safety equipment. If any of those conditions don’t apply, skip to the professional section.
Before You Begin
Gather: appropriate non-slip footwear rated for roof work, a safety harness attached to a ridge anchor if walking on the roof, rubber gloves, safety glasses, a pump garden sprayer or low-pressure spray system, and your chosen moss killer product.
Inform household members you’ll be working on the roof and isolate the area directly below the work zone from foot traffic. Check the weather. Only work in dry, settled conditions with no forecast rain for at least 12 hours after treatment.
Step 1: Apply the Moss Killer Solution
Low-pressure treatment cleaning with a diluted biocide solution is the safest DIY method.
Apply your chosen solution from the base of the roof section upward using a garden pump sprayer from ladder position where possible. When mixing bleach, a good rule of thumb is to dilute it to 1% bleach, 99% water. Apply to manageable sections. Ensure the solution covers all visible growth and penetrates into the mat where possible.
Most NZ-specific moss treatment products, including benzalkonium chloride-based products, are available from hardware stores. A range of moss and lichen treatment cleaning products are available in New Zealand. Most contain active ingredients like benzalkonium chloride.
Step 2: Allow Dwell Time
Once moss remover has been applied, allow 20 to 30 minutes for it to do its job. For larger or more established growth, many professional operators apply treatment and allow natural rainfall over several weeks to progressively wash the dead growth away rather than forcing removal immediately.
This patience-based approach is the key difference between professional results and DIY results. Attempting to remove all visible moss immediately after treatment damages roofing surfaces. The dead moss naturally detaches and washes away with rain over the following weeks.
Step 3: Wait for Rain to Rinse the Roof
One of the most underused advantages of treating roof moss in NZ is the climate itself. After thoroughly washing a roof, using a scrubbing brush or long-handled soft bristle brush to remove more stubborn moss that remains is an option, but be sure to get into all nooks and crannies where moss has formed, since just a single spore is enough to restart a new colony.
For most NZ homeowners, allowing two to four weeks of normal rainfall after treatment to progressively wash dead growth off the roof produces better results than attempting immediate physical removal.
Step 4: Remove Remaining Dead Moss (Low-Pitch Roofs Only)
If physical removal is needed after the moss has been killed and dried, carefully brush off dry moss with a stiff brush, working downward and never side to side, which can displace tiles. This work should only be attempted on single-level roofs with pitches safe enough to walk on.
Step 5: Rinse
Wash the chemicals off the roof with clean water from a garden hose. This is the final step once moss remover has been applied and allowed to work.
What Kills Moss on Roofs Naturally?
For homeowners who prefer to avoid chemical treatments, natural options exist but with realistic expectations on effectiveness.
Zinc and copper strips.
These are the most effective natural long-term prevention method. Install zinc or copper strips along the ridge of the roof. When rainwater runs over the metal, it carries trace amounts of zinc or copper ions down the roof surface. These ions are toxic to moss, algae, and lichen. Results build over time rather than providing immediate removal of existing growth.
Baking soda. Baking soda is a popular natural moss killer because it raises the pH of the surface, making it inhospitable to moss growth. Sprinkle dry baking soda directly onto moss and allow rain to activate it and wash it down the tiles. It is safe for most roof types and surrounding vegetation. It is less effective than biocide-based treatments on established growth.
Household vinegar.
White vinegar kills surface moss on contact due to its acidity. It is less effective at penetrating established moss mats and not recommended for metal roofing since the acid can affect coatings over time. On concrete tiles for mild growth, it is a low-risk first attempt.
The honest assessment of natural methods: they are best suited to prevention and very early-stage growth. For established moss, lichen, or any significant coverage, chemical biocide treatment or professional service gives meaningfully better results with longer-lasting effect.
How to Prevent Roof Moss from Growing Back
Prevention is significantly cheaper and safer than repeated removal.
Trim overhanging trees.
Moss, mould, and lichen thrive in damp, shaded conditions. Roofs that sit under trees, face away from the sun, or have low pitches stay wetter for longer. Porous materials like concrete tiles and textured shingles also hold moisture, giving growth something to grip. Reducing shade by trimming branches reduces the primary condition moss needs to establish.
Clean gutters regularly.
Blocked gutters cause water to overflow and sit against roofing materials and fascia boards. This sustained moisture is one of the key reasons moss establishes faster on some roofs than others. Clear gutters at least twice a year, more frequently if there is significant tree coverage nearby.
Install zinc or copper ridge strips.
As noted above, these are highly effective at preventing regrowth without requiring repeat chemical treatments.
Annual inspection.
Checking the roof from the ground with binoculars every year, particularly after winter, catches early growth before it becomes established. Early-stage moss is far easier and cheaper to treat than an established mat.
Schedule professional treatment on a regular cycle.
A professional soft wash roof treatment every 2 to 3 years, timed according to the property’s exposure level, maintains the roof in good condition without allowing growth to reach the point of structural risk. This approach costs a fraction of what tile replacement or repointing repairs cost once moisture damage has occurred.
The same low-pressure, chemistry-first approach that makes soft wash house washing so effective for exterior cladding applies directly to roof treatment, and many NZ providers offer both as a combined service at a meaningful cost saving over booking each separately.
Roof Moss Removal Cost in NZ
Understanding the cost of professional treatment helps with the DIY vs professional decision.
Professional roof moss treatment in NZ typically costs between $400 and $1,200 depending on roof size and condition.
DIY sprays from hardware stores may seem like an affordable solution, often costing between $30 and $120. However, the results are usually short-lived and can involve risks.
Putting these numbers in context: a DIY spray costs $30 to $120 but addresses only surface growth without root treatment, meaning regrowth typically returns within 6 to 12 months. Professional soft wash treatment costs $400 to $1,200 but kills growth at the root and holds results for 2 to 3 years. Calculated over a 6-year period, the annual cost of professional treatment is often comparable to or lower than repeated DIY attempts that don’t fully resolve the problem.
DIY or Professional Roof Moss Removal
The decision is not simply about whether DIY is possible. It is about whether the result of your DIY attempt will be comparable to professional treatment, and whether the personal safety risk is proportionate.
DIY is viable when:
- The roof pitch is low and walkable with appropriate safety gear
- Growth is early-stage and surface-level without deep lichen
- You are comfortable working from a ladder in dry conditions
- You use the correct chemical at correct dilution and allow adequate dwell time
Professional treatment is the better choice when:
- The roof pitch is steep or the property is two-storey
- There is significant lichen coverage requiring penetrating treatment
- The roof has been untreated for more than 3 years
- Tile or coating damage is already visible
- You do not have appropriate safety equipment
Many NZ exterior cleaning companies offer roof treatment, soft washing, and gutter cleaning as a combined maintenance package. Comparing bundled quotes can sometimes provide better value than booking each service separately.
Frequently Asked Questions
Can I remove roof moss myself, or should I hire a professional?
You can remove roof moss yourself on a low-pitch single-storey roof using a diluted biocide solution applied at low pressure. For steep roofs, two-storey properties, or established lichen growth, professional treatment is safer and produces longer-lasting results. Most falls from roofs in NZ occur from less than three metres, making even low roofs a genuine safety risk without appropriate equipment.
What is the safest DIY roof moss removal method?
Low-pressure treatment cleaning with a diluted biocide solution is the safest DIY method. Apply the solution, allow adequate dwell time, and let rainfall progressively wash the dead growth away rather than attempting immediate physical removal.
Is it okay to scrape moss off a roof?
Dry moss on low-pitch concrete or clay tile roofs can be carefully brushed off with a stiff brush, working downward only. Never work side to side, as sideways motion can displace tiles. Do not scrape or aggressively scrub, as this damages coatings and surface layers regardless of roof material.
What kills moss on roofs permanently?
Nothing permanently kills moss since spores are airborne and will always eventually re-establish. The most effective approach is professional soft wash treatment using sodium hypochlorite-based solution at correct dilution, which kills existing growth at the root and holds results for 2 to 3 years. Zinc or copper ridge strips add ongoing prevention between treatment cycles.
What happens if you leave moss on your roof?
Moss retains moisture that can seep into tiles and underlayment. As it spreads, it lifts tiles and shingles, leaving gaps for leaks. Over time, moisture build-up can cause timber to rot, leading to costly structural damage. Lichen, if left long enough, permanently bonds to tile surfaces and becomes significantly harder to remove without causing damage.
What kills moss naturally on roofs?
Zinc and copper strips installed at the ridge are the most effective natural long-term prevention method. Baking soda raises the surface pH and inhibits moss growth when applied dry and washed in with rain. White vinegar kills surface moss on contact but is less effective than biocide treatments on established growth. For significant coverage, natural methods alone are generally not enough.
How often should I check my roof for moss?
Annual inspections help prevent damage to roof structure and maintain property value. Inspect particularly after winter and before spring, when growth conditions have been at their most favourable. South-facing roof sections and areas under tree canopy need closest attention.
What is the best time of year to remove moss from a roof?
The best time to remove moss from a roof is when conditions are dry, stable, and before the next heavy season arrives. Autumn, after summer drying has weakened moss mats, is often the most effective timing. Spring treatment prevents growth from establishing through the wet winter season. Avoid treatment immediately before heavy rain, which would wash solution away before adequate dwell time is achieved.
Does regular gutter cleaning help prevent roof moss?
Yes. Blocked gutters cause sustained moisture against roofing materials and fascia boards, creating exactly the conditions moss needs to establish. Regular gutter cleaning at least twice a year, or more frequently with significant tree coverage nearby, reduces one of the key drivers of moss growth on NZ roofs.
Can I remove roof moss myself, or should I hire a professional?
You can remove roof moss yourself on a low-pitch single-storey roof using a diluted biocide solution applied at low pressure. For steep roofs, two-storey properties, or established lichen growth, professional treatment is safer and produces longer-lasting results. Most falls from roofs in NZ occur from less than three metres, making even low roofs a genuine safety risk without appropriate equipment.
What is the safest DIY roof moss removal method?
Low-pressure treatment cleaning with a diluted biocide solution is the safest DIY method. Apply the solution, allow adequate dwell time, and let rainfall progressively wash the dead growth away rather than attempting immediate physical removal.
Is it okay to scrape moss off a roof?
Dry moss on low-pitch concrete or clay tile roofs can be carefully brushed off with a stiff brush, working downward only. Never work side to side, as sideways motion can displace tiles. Do not scrape or aggressively scrub, as this damages coatings and surface layers regardless of roof material.
What kills moss on roofs permanently?
Nothing permanently kills moss since spores are airborne and will always eventually re-establish. The most effective approach is professional soft wash treatment using sodium hypochlorite-based solution at correct dilution, which kills existing growth at the root and holds results for 2 to 3 years. Zinc or copper ridge strips add ongoing prevention between treatment cycles.
What happens if you leave moss on your roof?
Moss retains moisture that can seep into tiles and underlayment. As it spreads, it lifts tiles and shingles, leaving gaps for leaks. Over time, moisture build-up can cause timber to rot, leading to costly structural damage. Lichen, if left long enough, permanently bonds to tile surfaces and becomes significantly harder to remove without causing damage.
What kills moss naturally on roofs?
Zinc and copper strips installed at the ridge are the most effective natural long-term prevention method. Baking soda raises the surface pH and inhibits moss growth when applied dry and washed in with rain. White vinegar kills surface moss on contact but is less effective than biocide treatments on established growth. For significant coverage, natural methods alone are generally not enough.
How often should I check my roof for moss?
Annual inspections help prevent damage to roof structure and maintain property value. Inspect particularly after winter and before spring, when growth conditions have been at their most favourable. South-facing roof sections and areas under tree canopy need closest attention.
What is the best time of year to remove moss from a roof?
The best time to remove moss from a roof is when conditions are dry, stable, and before the next heavy season arrives. Autumn, after summer drying has weakened moss mats, is often the most effective timing. Spring treatment prevents growth from establishing through the wet winter season. Avoid treatment immediately before heavy rain, which would wash solution away before adequate dwell time is achieved.
Does regular gutter cleaning help prevent roof moss?
Yes. Blocked gutters cause sustained moisture against roofing materials and fascia boards, creating exactly the conditions moss needs to establish. Regular gutter cleaning at least twice a year, or more frequently with significant tree coverage nearby, reduces one of the key drivers of moss growth on NZ roofs.