How to clean windows without streaks depends on three things: the cleaning solution you use, the tools you clean with, and the conditions on the day. For most NZ homes, a 1 to 2 ratio of white vinegar to water combined with a squeegee and microfibre cloth produces genuinely streak-free results. For exterior windows with heavy grime, bird deposits, or hard water build-up, the technique and sequence matter as much as the product.
In this guide, you’ll learn the best ways to clean windows without streaks step by step, covering homemade solutions, the best tools, inside and outside windows, how to clean exterior and high windows, the professional technique, and why your windows might still streak even after cleaning.
Quick Answer: Choose a cloudy day. Dust frames and sills first. Mix 1 part white vinegar to 2 parts water in a spray bottle. Apply to the glass and wipe top to bottom with a squeegee using overlapping S-strokes. Wipe the squeegee blade after every pass. Buff edges and corners with a dry microfibre cloth. Never clean in direct sunlight. Never use paper towels.
Best Ways to Clean Windows (Cleaning Methods Comparison)
| Method | Best For | Streak Risk | Cost |
| Vinegar and water (squeegee) | Interior and accessible exterior | Very low | Very low |
| Dish soap and water (squeegee) | Heavily soiled exterior | Low if rinsed well | Very low |
| Microfibre cloth only | Light dust, quick interior clean | Low | Low |
| Newspaper and vinegar | Small windows, interior | Low | Negligible |
| Commercial glass cleaner spray | Quick spot cleans | Moderate (residue risk) | Low to moderate |
| Deionised water (professional pole) | High and exterior windows | Very low | Professional service |
| Rubbing alcohol solution | Greasy marks, fingerprints | Very low | Low |
Best Window Cleaning Methods Ranked
| Rank | Method | Best For |
| #1 | Vinegar + squeegee + microfibre | Most NZ homes |
| #2 | Dish soap + squeegee | Heavy exterior dirt |
| #3 | Deionised water | Professional cleaning |
| #4 | Rubbing alcohol solution | Greasy interior glass |
| #5 | Newspaper | Small interior windows |
| #6 | Commercial spray cleaners | Spot cleaning |
Why Do Clean Windows Still Have Streaks?
Most people who struggle with streaky windows are using a reasonable technique but failing on one of these specific variables.
Streaks have specific, diagnosable causes. Streaks that appear everywhere in even distribution point to too much soap or the wrong cleaner. White spots or cloudy film indicate hard water minerals. Streaks that appear quickly after cleaning are caused by sunlight evaporation. Tiny fibre marks visible in sunlight come from paper towels or cotton cloth. Lines running vertically from the top mean edge water is dripping down. Random streaks in no pattern indicate a dirty squeegee blade.
Hard water is a major factor in NZ.
Minerals like calcium and magnesium found in hard water build up on glass surfaces and leave streaky mineral deposits. This is particularly relevant in parts of New Zealand where tap water has higher mineral content. If your windows always cloud up after cleaning despite good technique, hard water residue in the tap water you’re using is likely the cause. Switching to a diluted vinegar solution or using a splash of distilled water in your final rinse resolves this.
Too much cleaning product.
Commercial glass cleaners contain surfactants and additives that clean effectively but tend to leave residues of their own. The residue may not be visible when the window is wet, but as the cleaner evaporates, it leaves a thin film that catches light and produces streaks. Some homeowners try to compensate by using more cleaner, which actually makes the problem worse.
Cleaning in direct sunlight.
The best day to clean windows is when it is overcast since there is minimal sunlight. Direct sunlight causes water to dry quickly and leave behind streaks before you can wipe the glass clean.
Wrong cloth.
Avoid using soap and paper towels for cleaning glass. Paper towels leave lint and fibre marks. A microfibre cloth or newspaper prevents streaks and lint far more effectively.
In our experience cleaning windows across NZ homes, the single most common cause of frustrating results after careful DIY cleaning is paper towels. Homeowners assume paper towels are fine for glass because they look clean when dry. They consistently leave fibres that catch sunlight and look like streaks.
Why Are My Windows Streaky?
| Problem | Likely Cause | Best Fix |
| White haze | Hard water | Vinegar |
| Lint marks | Paper towels | Microfibre |
| Vertical lines | Dirty squeegee | Clean blade |
| Cloudy glass | Too much cleaner | Use less product |
| Streaks after drying | Sunlight | Clean on cloudy day |
The Best Window Cleaning Solution
How to Clean Windows with Vinegar (Most Effective DIY Method)
Vinegar is the most effective and most accessible DIY window cleaning solution for NZ homes.
Vinegar is highly acidic and breaks down the particles on glass to produce a streak-free shine without damaging the glass. Compared to commercial glass cleaners formulated with harsh chemicals, vinegar is a natural, non-toxic alternative that only needs to be combined with water.
The right ratio of vinegar to water for cleaning windows:
A ratio of 2 parts water to 1 part vinegar should do the trick for most windows. For dirtier windows with grime or hard water build-up, move to a 1 to 1 ratio. For lightly soiled interior windows, 3 parts water to 1 part vinegar is sufficient and uses less vinegar per clean.
Getting the ratio right makes the single biggest difference between a streaky result and a genuinely clear finish. Too much vinegar can leave a strong smell and potentially affect nearby surfaces.
Pour the solution into a spray bottle. Shake gently before each use.
Should you let vinegar sit on windows or wipe it off immediately?
Apply the solution and wipe within 30 to 60 seconds. You do not need to leave it sitting on the glass. Vinegar works quickly on glass. Leaving it too long in direct heat can cause it to evaporate before you wipe and leave a faint residue. In shaded or overcast conditions, working within a couple of minutes is fine.
Dish Soap and Water
For exterior windows with heavy soiling, a small amount of dish soap in warm water helps cut through grime more effectively than vinegar alone. The detergent breaks surface tension and helps the applicator glide smoothly over the glass. It also cuts through greasy marks, fingerprints, and traffic film. Too much detergent creates heavy suds and leaves residue on the glass. Use the minimum amount so the water feels slightly slippery but does not foam excessively.
Rinse the glass thoroughly after washing with dish soap. Soap residue left on glass is a primary cause of streaks.
Rubbing Alcohol Solution for Greasy Glass
For interior windows with fingerprints, nose marks (children and pets), or oily residue, a solution of 1 part rubbing alcohol to 3 parts water cuts through grease quickly and dries without residue. Apply with a microfibre cloth and buff dry. Rubbing alcohol is available at NZ pharmacies and most supermarkets.
What Not to Use on Windows?
Bleach. Damages window frames and seals and leaves residue on glass.
Ammonia-based cleaners. Certain home cleaning products that include ammonia can create streaks on glass surfaces over time. While ammonia does clean glass, it can damage window seals, tint films, and surrounding surfaces when used regularly.
Paper towels and cotton cloths. Both leave fibre marks on glass that are visible in sunlight.
Too much of any product. Less cleaning solution produces better results on glass than more. Over-application is one of the most consistent causes of streaking across all methods.
The Best Tools for Streak-Free Windows
Squeegee
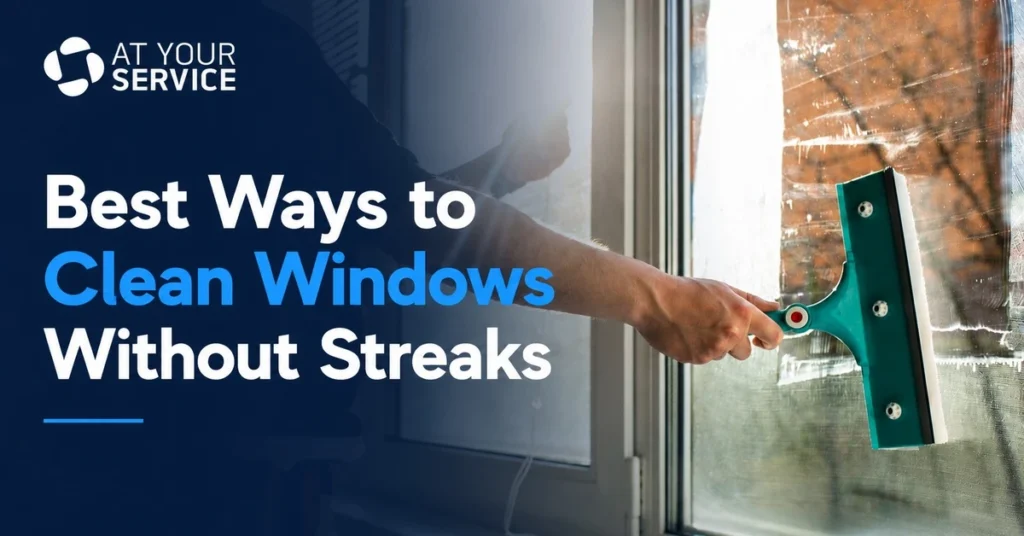
The best way to ensure a streak-free finish is to use a squeegee. Squeegees feature a rubber blade that removes the cleaner as you drag it across the surface. Replace blades at the first sign of wear to maintain effectiveness.
A worn or dirty rubber blade is a common cause of streaks that most DIY guides don’t address. Run a finger along the blade before you start. If it feels rough, uneven, or leaves marks on your palm, replace it. Replacement blades are inexpensive and available from hardware stores including Bunnings NZ.
Wipe the squeegee blade with a clean dry cloth after every single pass across the window. Transferring dirty water from one stroke to the next is the most common squeegee mistake.
Microfibre Cloth
Microfibre is the best cloth for cleaning glass and for buffing edges dry after squeegeeing. Lint and streaks are avoided by using a lint-free microfibre cloth. Use a cloth that is only for cleaning windows to avoid oil and chemical residue from other cleaning tasks.
Keep window cloths separate from cloths used for other surfaces. A microfibre cloth contaminated with kitchen grease or bathroom cleaner will transfer that residue to glass.
Newspaper
Newspaper is lint-free and mildly abrasive so it is good for removing dirt. Spray a mix of water and white vinegar onto the glass and wipe with balls of newspaper. This is the traditional NZ window cleaning method and still works well, particularly for interior windows. The main drawback is that it is more physically intensive than a squeegee and can occasionally leave faint ink marks on light-coloured frames.
How to Clean Windows Without Streaks?
Before You Start
Choose the right day.
When there is cloud cover or the sun is not shining directly on the windows, it is ideal to clean them. Streaks may result from cleaning in direct sunlight since the cleaning solution dries too quickly. An overcast NZ morning is ideal. Avoid cleaning in wind, which dries solution before you can squeegee it.
Prepare your tools.
Spray bottle with vinegar solution, clean squeegee with good rubber blade, two microfibre cloths (one for washing, one for drying edges), a small soft brush or vacuum for frames and tracks.
Step 1: Clean Frames, Sills, and Tracks First
Always clean frames and sills before touching the glass. Dust, pollen, and debris on frames fall onto wet glass during cleaning and cause streaking. Wipe frames with a damp cloth. Use a soft brush or vacuum attachment to clear debris from window tracks. Dirty tracks are commonly overlooked and contribute significantly to how quickly clean windows re-soil.
Step 2: Remove Cobwebs and Loose Dust
Run a dry cloth or soft brush over the glass surface before applying any solution. This removes loose dust and debris that would otherwise spread across the glass when wet.
Step 3: Apply Your Cleaning Solution
Spray the vinegar solution directly onto the glass. Do not over-spray. Over-spraying causes the solution to drip and pool at the bottom, creating more work rather than less. A light, even mist across the entire pane is sufficient.
Step 4: Wipe Top to Bottom
Work from the top of the glass to the bottom in a zig-zag or S-pattern without lifting the cloth off the surface. This stops drips and evenly covers the full pane.
If using a squeegee, start at the top corner and drag in overlapping horizontal strokes moving downward. Wipe the blade with a dry cloth after every stroke without exception.
If using a microfibre cloth, work in the same top-to-bottom S-pattern. Fold the cloth to a fresh, dry section regularly as you work across the pane.
Step 5: Buff the Edges and Corners
Finish with a completely dry microfibre cloth along the edges and bottom corner, where moisture tends to linger. This final step removes the remaining 10% of any streaking.
The edges and bottom corners are where most streaks appear on otherwise well-cleaned windows. This step takes 15 to 20 seconds per window and makes a significant difference to the final result.
Step 6: Final Check in Raking Light
Once complete, stand at an angle to the window where you can see the glass in raking light (light coming across the surface rather than through it). This reveals any remaining streaks or missed areas. Buff any remaining marks with a clean dry microfibre cloth.
How to Remove Hard Water Stains from Windows
How to Clean Outside Windows?
Exterior windows face rain, dust, pollen, bird droppings, salt air (in coastal NZ areas), and UV exposure. They require more preparation than interior windows and different tools for higher levels.
Ground-level exterior windows:
Use the same vinegar and squeegee method as for interior windows, but start with a rinse using a garden hose or wet scrubber to loosen heavy soiling before applying solution. Work section by section from top to bottom.
How to clean outside windows you can’t reach:
For first-floor and higher exterior windows, extension poles with squeegee or microfibre mop attachments allow ground-level cleaning of most residential windows safely. Telescopic poles are available from NZ hardware stores. For two-storey and above, professional cleaning is the safer and more effective option.
Coastal NZ homes:
Salt air deposits on exterior windows create a specific type of mineral build-up that requires a slightly stronger vinegar solution (close to 1 to 1 ratio) or a commercial mineral deposit remover before the standard clean.
How to remove bee poop from windows:
Bee honeydew spots are a genuine and common NZ-specific problem, particularly in summer. Soak the affected area with undiluted white vinegar and leave for 2 to 3 minutes to dissolve the organic deposits. Then clean as normal. For heavy bee activity periods, more frequent exterior cleaning maintains results between full cleans.
How to Clean Interior Windows?
Interior windows accumulate fingerprints, condensation residue, cooking vapour (particularly in kitchens), and dust. The cleaning method is the same as the step-by-step above, but with less aggressive solution needed.
For kitchen windows with cooking grease residue, a small amount of dish soap in the vinegar and water solution cuts through the grease layer before squeegeeing clean.
For double-glazed windows, clean the interior surface only. Condensation or cloudiness that appears between the two panes of a double-glazed unit indicates a failed seal, which cannot be resolved through cleaning. This requires the glass unit to be replaced.
What Do Professional Window Cleaners Use?
This is one of the most searched questions on this topic, and the answer is more interesting than most people expect.
Professional window cleaners use pure or deionised water. Pure water is created by removing all dissolved solids through reverse osmosis and deionisation. This leaves the water “hungry” with a strong chemical desire to bond with dirt and minerals. When applied to glass, it attracts and absorbs contaminants from the surface, allowing dirt to be rinsed away completely. When pure water dries on a window, nothing is left behind. The glass dries spot-free without any wiping at all.
Traditional window cleaners still use a very simple mix: clean warm water with a measured amount of professional window cleaning detergent or mild eco washing-up liquid. The key is using just enough that the water feels slightly slippery but does not foam excessively. They remove the mix with a sharp rubber squeegee and finish edges with a microfibre cloth.
The professional result advantage comes primarily from three things: deionised water quality, tool hygiene (clean blades, clean cloths), and the systematic top-to-bottom technique applied consistently across every pane.
What Is the Best Homemade Window Cleaning Solution?
Based on the DIY methods tested across NZ homes, here are the most effective homemade options ranked by use case:
For most windows: 1 part white vinegar to 2 parts warm water in a spray bottle. This is the most effective, safest, and most accessible homemade solution for the majority of NZ households.
For very dirty windows: 1 to 1 vinegar and water, plus a small drop of dish soap. The soap helps cut through grime before squeegeeing clean.
For greasy interior glass: 1 part rubbing alcohol, 1 part water, 1 tablespoon white vinegar. Cleans grease and fingerprints very effectively.
Basic baking soda paste for stuck-on deposits: For stubborn spots including mineral deposits or bee poop, mix baking soda with a small amount of water to form a paste. Apply to the spot, leave for a few minutes, wipe gently, then clean the full window as normal. Do not use this method on tinted or coated glass.
When to Call a Professional for Window Cleaning
DIY window cleaning works well for ground-floor and easily accessible windows. There are clear situations where professional window cleaning is the safer, more effective, and better-value option.
High and hard-to-reach windows.
Cleaning second-storey or higher windows from a ladder carries genuine injury risk. According to WorkSafe New Zealand, falls from height remain a significant safety hazard, making professional window cleaning a safer option for many elevated windows. Using long poles and deionised water systems eliminates the need to position ladders close to the glass. This improves both safety and cleaning efficiency when working on high or difficult-to-access windows.
Commercial and large-scale properties.
The time and effort of cleaning a large commercial building or a home with extensive glazing makes professional services the practical option.
Before a rental inspection.
Clean windows can make a noticeable difference during a final property inspection. For hard-to-reach exterior windows, a professional clean may be the safest and most practical option.
Persistent results despite correct technique.
If streaks consistently appear despite using the right tools and solution, hard water deposits on the glass or failed window seals may be involved. Professional assessment can identify the cause and resolve it with appropriate equipment.
For homes that want consistently clean windows without the time investment of DIY cleaning, a professional window cleaning service delivers the deionised water result and correct high-access technique that domestic tools cannot replicate.
How Often Should Windows Be Cleaned?
Interior windows: Clean every 2 to 3 months for most NZ homes, or when visible dust, fingerprints, or condensation residue accumulates.
Exterior windows: Every 3 to 6 months for standard residential properties. Coastal NZ homes with salt air exposure benefit from more frequent exterior cleaning (every 6 to 8 weeks) to prevent mineral and salt build-up bonding to the glass. Properties near heavy traffic benefit from similar frequency due to exhaust film accumulation.
After major weather events: Clean exterior windows after storms, particularly in NZ’s storm-heavy winter months, when salt, dust, pollen, and debris deposit heavily on exposed glass.
Frequently Asked Questions
What can I clean my windows with that won’t leave streaks?
A 1 to 2 ratio of white vinegar and water applied with a squeegee and buffed dry with a microfibre cloth is the most reliably streak-free DIY method. The key is clean tools, the right technique, and cleaning on a cloudy day rather than in direct sunlight.
Why are my windows still streaky after cleaning?
The most common causes are: too much cleaning product leaving residue, hard water minerals in tap water creating cloudy deposits, cleaning in direct sunlight causing solution to evaporate too fast, paper towels leaving fibre marks, or a dirty squeegee blade transferring grime across the glass. Identify which cause matches your result and the fix is straightforward.
What do professional window cleaners use in their solution?
Professional window cleaners use pure or deionised water for exterior work. This water has all dissolved minerals removed, so when it dries on glass, nothing is left behind and the surface dries spot-free. For traditional squeegee work, they use deionised or soft water with a very small amount of professional window cleaning detergent.
Can I use straight white vinegar on windows?
Undiluted white vinegar is safe for glass and very effective on stubborn mineral deposits or bee honeydew. For general cleaning, diluting 1 to 2 with water produces better results and uses less vinegar. Avoid leaving undiluted vinegar on metal window frames for extended periods, as the acid can affect some frame finishes.
Should I let vinegar sit on windows or wipe it off?
Apply and wipe within 30 to 60 seconds. You do not need to leave it sitting. Vinegar works quickly on glass. Leaving it in direct sunlight or heat causes it to evaporate before you can squeegee and may leave a faint residue.
What is the disadvantage of vinegar in cleaning windows?
Vinegar’s acidity can affect certain window frame materials, particularly unsealed stone surrounds, some aluminium finishes, and rubber seals if applied repeatedly in high concentration. Always dilute for regular cleaning. Avoid spraying vinegar directly onto frames. Its smell is also noticeable during cleaning but dissipates completely once the glass dries.
Can vinegar remove hard water stains from windows?
Yes. Vinegar is effective for removing most light to moderate hard water stains because its acidity dissolves calcium and mineral deposits. For severe staining, multiple treatments or professional mineral-removal products may be required.
What is the best homemade window cleaner?
A ratio of 2 parts water to 1 part white vinegar sprayed onto glass and wiped with a microfibre cloth or newspaper is the most effective and versatile homemade window cleaner. For heavier soiling, add one drop of dish soap per 500ml of solution.
How do window cleaners get crystal-clear windows?
The combination of deionised water, correct tool hygiene (clean blades and fresh cloths), systematic top-to-bottom technique, and cleaning in appropriate lighting conditions produces the crystal-clear professional result. At home, using the right vinegar solution ratio, a clean squeegee, and buffing dry edges with microfibre gets very close to the same outcome on accessible windows.
Do window cleaners just use soapy water?
Traditional window cleaners use water with a very small, measured amount of professional detergent or washing-up liquid. Too much soap creates foam and leaves residue. Professional results come from the quality of the water, the precision of the technique, and the cleanliness of the tools, not from the product itself.